If the colorings for your pics are bland, then are trying some thing else.
one of the vital biggest complications that photographers have when it involves portraiture may also be dealing with the colours. The essential way to do that is to comfortably just shoot right through the golden hour, however that takes away a massive part of the inventive system. Making the colorings to your picture pop no longer simplest has to do with effective placement, however additionally has to do with their tones, the lighting fixtures, and your processing. Let's delve additional!
The elements of Your photograph (discipline, Foreground, background)
before you even click on the shutter, make sure you beginning with constructing your scene. It's most appropriate for there to be three primary hues:
All of those issues may still be different hues and tones are are powerful satisfactory so as to add very clear distinction. purple, yellow, blue, and eco-friendly tend to add the most contrast with the wide variety of skin tones out there. So too do black and white. mix with this the elements of the scene: the field, background and foreground. be sure that there is reasonably a bit of of contrast between them.

within the illustration above we are able to break this down:
All of this can be performed with constructive lighting fixtures, white steadiness, and post construction. We'll get to that soon after you solidify this step on your head.
within the creation procedure: identify the Three main colours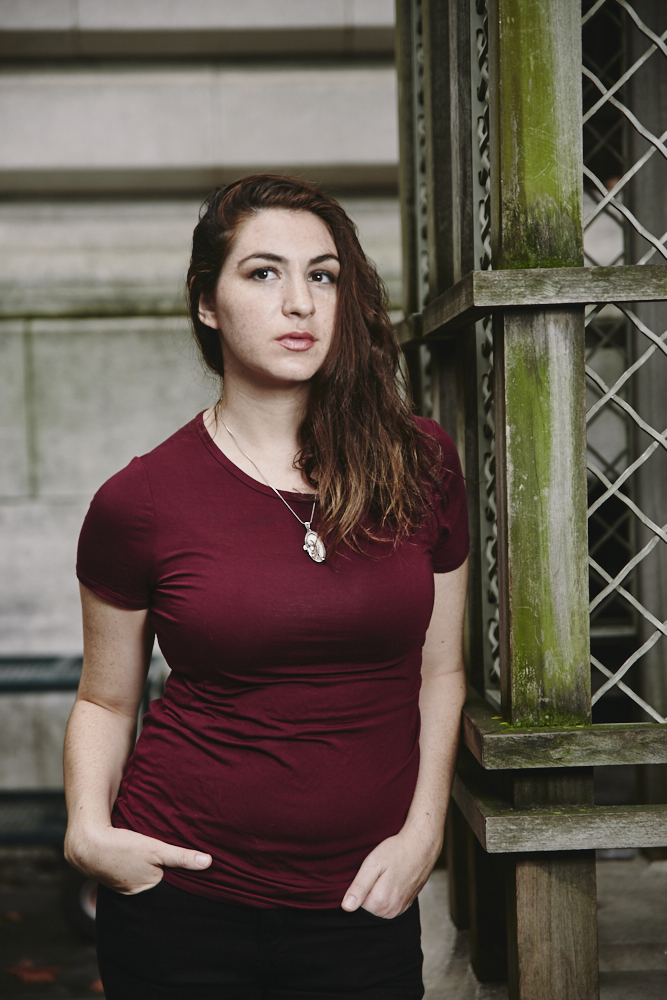
Now that we be aware of that we want three leading shades, we deserve to establish them and gauge them on the ROYGBIV scale. rarely do three shades right next to every other in the colour scale work collectively in a scene. The top-rated is to get one from each and every end and one within the core. in order that means:
Of route, that's simply just a little of a rule that may also be tremendous to comply with. It doesn't deserve to. That, however, becomes greater complex as we'll demonstrate afterward.
during this scene the three leading colors are:
i used to be capable of get these hues by using a flash to make the whites brighter and by using a hard and fast white stability while capturing.
The significance of White steadiness and a good beginning element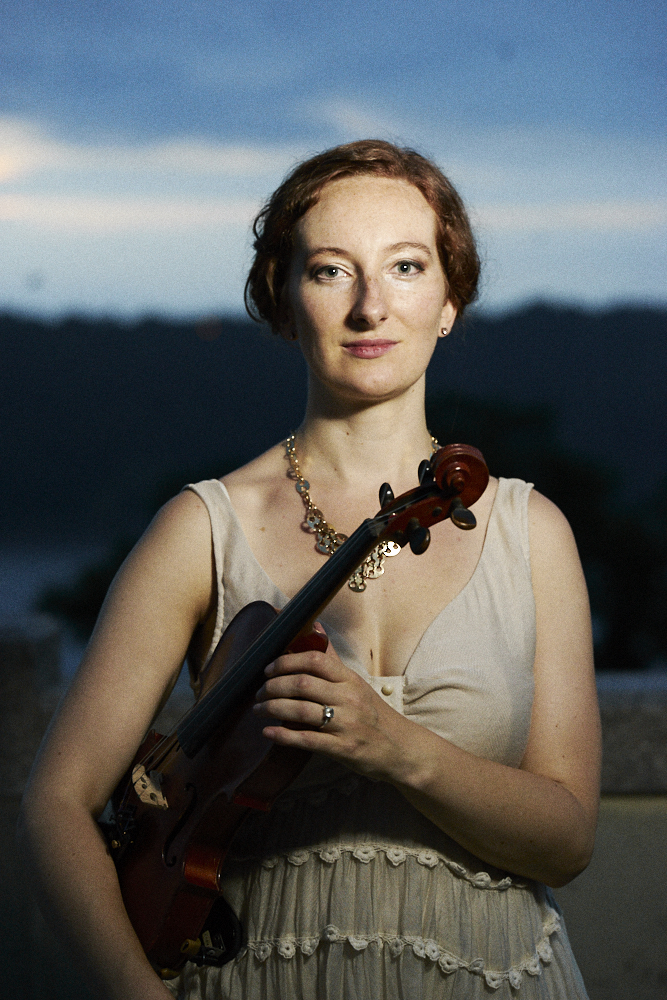
On the web site, you'll hear me talk about locking your white stability frequently and it's for notable reasons. They are likely to work most effective with epidermis tones in standard and additionally lights varieties. that you would be able to of course regulate in put up, but if you don't be aware of the way to work with the colorings, saturations or luminance for each and every colour channel, then you're out of success.
The image above become shot at 5600K daylight white balance. since it's nightfall, the historical past is a deep blue. however the flash that's firing on Anna is sunlight hours white balanced. so that capability that it's going to light up her to "normalize" the colour and make her stand out. The system is primary: she's donning white, she's a tone of orange, the history is blue. there's sufficient colour distinction in the scene to make the hues and topics pop out.
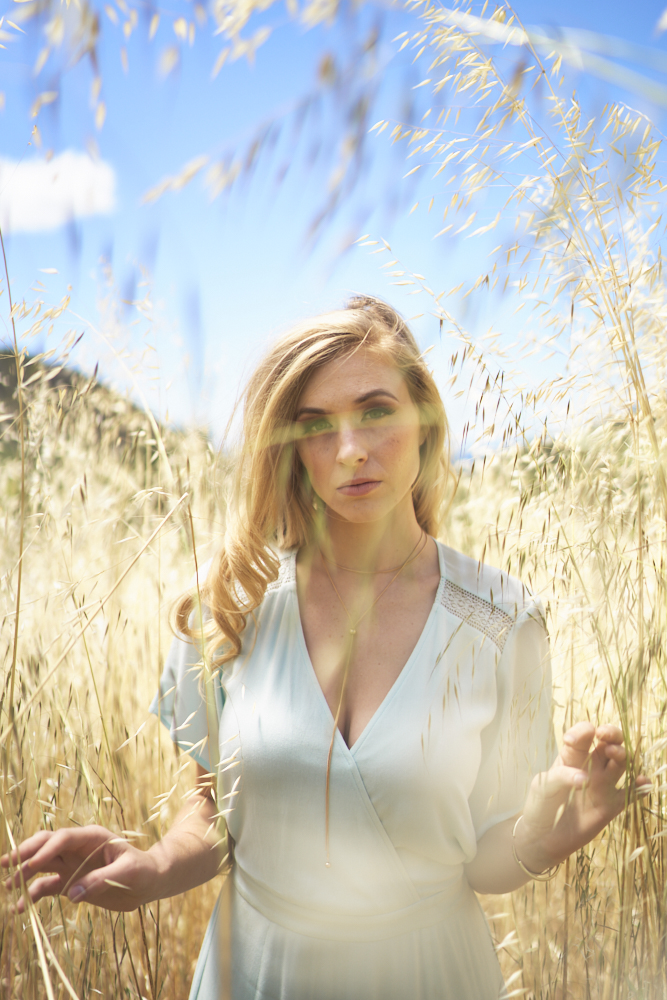
We did the same right here: the model is a tone of orange, the box is yellow, she's donning blue and the sky is blue. however here is how this all works out so well:

once in a while, the best thing that you should do is figure with each color channel to make them pop. in this instances the orange blends into his hat, his skin and the background. but by using adjusting it from a hard and fast white steadiness and balancing the shadows and highlights, we get a area that stands out and where the colorations pop because of their being distinctive brightness degrees. Or during this case, diverse luminance levels.
Then there's his hat, his sweater, and the gentle. Plus the out of focal point areas.

right here, it became a be counted of changing the blue to be very saturated, making Sarah's orange toned dermis a little less saturated, making her hair more saturated, and making the eco-friendly historical past pop by way of brightening it and saturating it. as soon as the three large colorations are recognized, that you would be able to work with their HSL settings to make the hues pop.
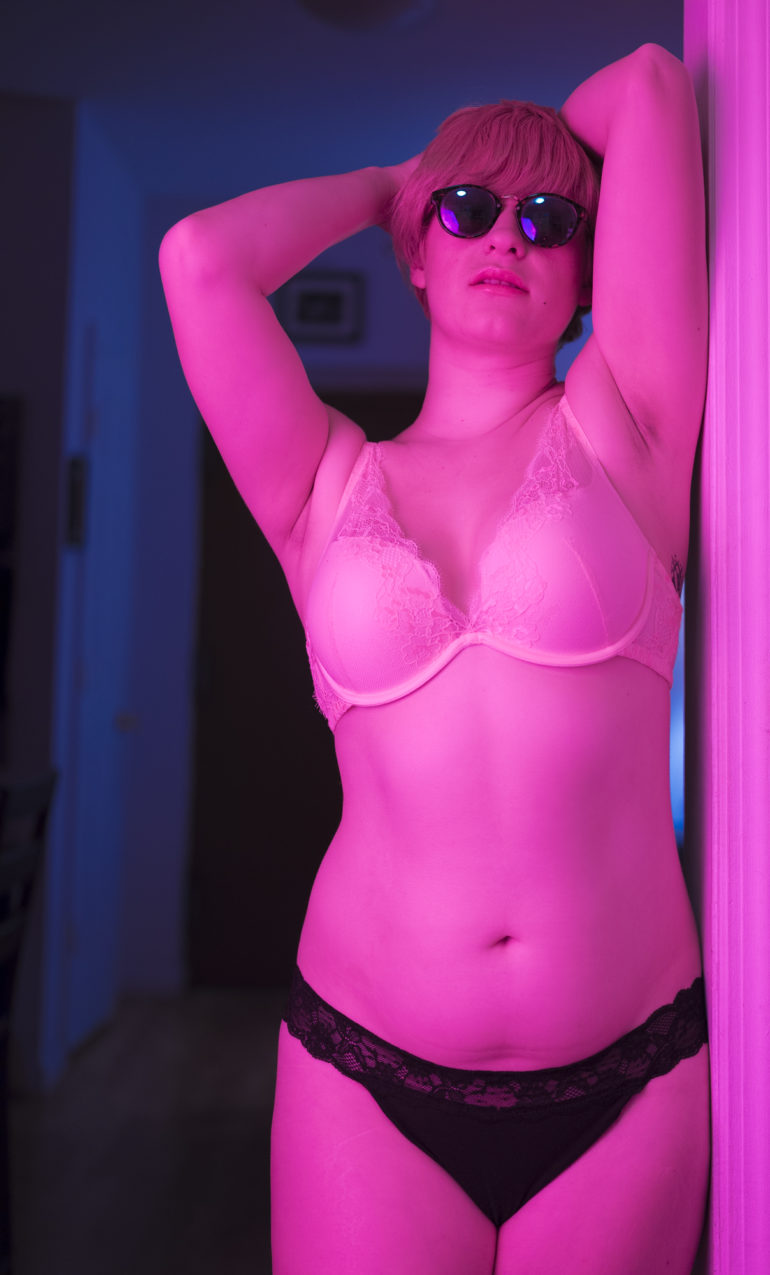
Or…Use a Gelled Flash
The arguably more convenient way to do all this is to add a flash to the scene and easily gel it. It's a popular seem with the neons being delivered in. When combined with controlling what your subject wears, white balances being locked, and different brightnesses, you can make the hues pop.


0 comentários:
Postar um comentário